
How To Put The String On A Fishing Rod involves threading the line through the guides and securing it on the reel. This process ensures your fishing setup is ready for casting and can significantly improve your fishing experience.
Whether you’re a beginner or a seasoned angler, knowing how to properly string your rod can make all the difference. A well-strung rod enhances accuracy and helps you catch more fish during your outings.
Before you start stringing your fishing rod, it’s essential to understand its components. Knowing each part will make the process smoother and help you fish more effectively.

Understanding Fishing Rod Components
Every fishing rod has a few key parts that you should familiarize yourself with. Understanding these components will not only help you when you learn how to put the string on a fishing rod but also enhance your overall fishing experience.
The first major component is the rod blank. This is the long, flexible part of the rod that gives it strength and sensitivity. A good rod blank can drastically affect how well you feel bites and set hooks. Think of it as the backbone of your rod.
Next up are the guides. These are the small loops that run along the length of the rod, allowing the fishing line to move smoothly. Guides help in controlling the line during casting and retrieving. They also ensure that the line doesn’t get tangled, which can be super frustrating while you’re out on the water.
Finally, there’s the reel seat. This is where you attach your fishing reel, and it’s crucial for balancing the rod and providing stability. A secure reel seat ensures that your reel stays in place, even when you’re reeling in a big catch. Without a reliable reel seat, you might find yourself in a messy situation when a fish bites!
As an example, imagine you’re out fishing, and you finally get a big tug on your line. If your rod blank is high-quality and your guides are properly aligned, you’ll feel that bite right away and be able to react quickly. Having a sturdy reel seat means your reel won’t slip, giving you the leverage you need to reel in that fish.
When you understand these components, you’ll find that stringing your rod becomes a lot easier. Plus, it’ll make your time on the water much more enjoyable!
Choosing the right fishing line is crucial for your success on the water. The type of line you select can affect your casting distance, strength, and overall fishing experience. Let’s break down the main options so you can make an informed choice.

Choosing the Right Fishing Line
When picking a fishing line, you’ll typically choose between monofilament and braided lines. Each type has its unique benefits, which can make a big difference in your fishing game.
Monofilament line is a popular choice for many anglers. It’s easy to handle, stretches a bit, and is forgiving when you’re reeling in a fish. However, it can be more visible in the water, which might spook some fish.
On the other hand, braided line offers superior strength and sensitivity. It has less stretch, which means you’ll feel bites more easily and can set the hook faster. If you’re after bigger fish or fishing in heavy cover, braided line could be your best bet.
Line Strength
Line strength is measured in pounds and indicates how much weight the line can handle without breaking. For example, if you’re targeting bass, a 10-20 pound test line is often recommended. If you’re going after larger species like pike or saltwater fish, you might want to bump that up to 30 pounds or more.
Line Length
Length isn’t just a number; it can make a significant difference in your fishing experience. Most fishing lines come in spools of 150 to 300 yards. Consider how far you’ll be casting and the type of fishing you’ll be doing. If you’re shore fishing, you might need longer lines compared to boat fishing.
When you’re ready to put the string on your fishing rod, remember that the right line can enhance your performance. Take your time to match your line type, strength, and length to your fishing style for the best results. Happy fishing!
Getting your fishing rod ready to string the line is a crucial first step that many anglers overlook. A well-prepared rod can make all the difference when you’re out on the water, ensuring a smoother experience. Here’s how to get your rod prepped before you dive into the fun part of fishing.
Preparing Your Fishing Rod
Before you put the string on your fishing rod, you need to make sure everything is in tip-top shape. This involves cleaning the rod, checking the guides, and preparing the reel. Each of these steps plays a vital role in ensuring your fishing adventure goes off without a hitch.
First, start with cleaning your rod. Dust, dirt, and salt can accumulate over time, especially if you’ve been fishing in harsh conditions. Take a soft cloth and gently wipe down the entire rod, paying special attention to the guides and reel seat. This ensures that your line won’t snag during casting.
Next, check the guides for any damage. The guides are the loops that hold the fishing line as it travels from the reel to the tip of your rod. Look for any cracks or rough spots that could potentially cut your line. If you find any issues, it might be time to repair or replace them. Trust me, a damaged guide can ruin your fishing day!
Now, let’s prepare the reel. Make sure the reel is clean and functioning properly. Check the drag system to ensure it’s working smoothly. If you hear any grinding noises or notice any stiffness, it might need some lubrication. A well-maintained reel will help you reel in that big catch without any hiccups.
For example, I once forgot to check my guides before a weekend fishing trip and ended up losing a prized catch because the line snagged. That experience taught me the importance of preparation. Taking just a few minutes to inspect your gear can save you a lot of frustration later.
Finally, always remember that a little maintenance can go a long way. Keeping your fishing rod clean and checking for any issues will not only extend the life of your gear but will also enhance your overall fishing experience. You’ll be glad you took the time to prepare when you’re out there reeling in the big one!
Stringing a fishing rod may seem tricky at first, but with a little guidance, you’ll master it in no time. This process is essential for a successful fishing trip, so let’s get right into it!

How to String the Fishing Rod
Getting your fishing rod ready involves a few straightforward steps. By threading the line through the guides, attaching it to the reel, and winding it correctly, you’ll have your rod strung up and ready for action.
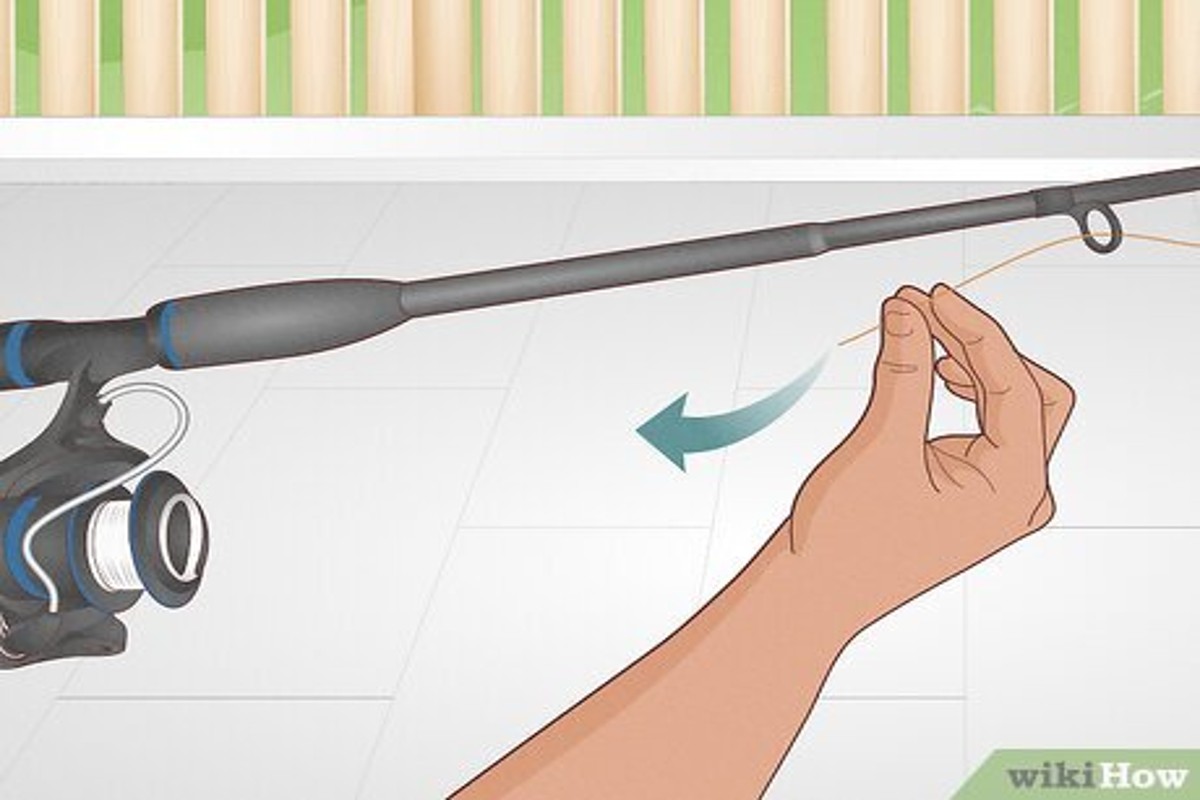
First, let’s talk about threading the line through the guides. Start at the tip of the rod and feed the fishing line through the first guide. Work your way down, ensuring it goes through each guide smoothly. This might take a little finesse, especially if you’re using a lightweight line. Just remember, the line should come off the spool in the same direction as the guides to avoid twists.
Next, you’ll attach the line to the reel. If you’re using a spinning reel, open the bail arm and tie the line to the spool with a simple knot, like a double knot or an improved clinch knot. For baitcasting reels, you’ll want to make sure the line is anchored properly before closing the bail. A secure attachment is key—this means less chance of losing your catch!
Now, let’s get to winding the line correctly. As you turn the handle of the reel, keep the line taut but not overly tight. This helps ensure even distribution on the spool. You might want to use your fingers to guide the line as it winds, preventing any tangles or loops. A good rule of thumb is to keep checking that it fills evenly across the spool. If you’ve got a buddy with you, they can help by holding the spool while you wind.
When you’re winding the line, think about this scenario: you’re out on the lake, and you finally get a nibble. The last thing you want is a tangled line that could ruin your catch! By following these steps, you can avoid that hassle and focus on reeling in your trophy fish.
Remember, practice makes perfect. The more you string your fishing rod, the more comfortable and efficient you’ll become at it. Happy fishing!
Securing your fishing line is crucial for a successful day out on the water. Getting this right can make the difference between reeling in a big catch and losing it. Let’s dive into how you can properly secure the line and make necessary adjustments.
Securing the Line and Adjustments
Once you’ve threaded the line through the rod guides, the next step is to make sure it’s secured properly. This involves choosing the right knot and adjusting the line tension to prevent any issues while you’re fishing.
First off, tying the right knot is essential. A common choice among anglers is the improved clinch knot. It’s strong and simple to tie. Just thread the line through the eye of the hook or reel, wrap it around the standing line several times, and then tuck the end through the loop you created. Don’t forget to moisten the knot before tightening it to avoid fraying the line.
After securing the knot, adjust the line tension. You want it tight enough to prevent slack but not so tight that it affects casting. A good rule of thumb is to pull the line with a firm grip; it should have a little give but overall feel secure. This helps ensure that your lure or bait acts naturally in the water.
Lastly, always check for tangles before you start fishing. A tangled line can lead to frustrating snags and lost time. Unravel any knots you find and give the line a quick run through your fingers to spot potential issues. If you find a tangle, gently work it out instead of pulling hard, which could damage your line.
As a practical tip, consider practicing these steps at home before your fishing trip. Setting everything up in a relaxed environment can help you feel more confident when you’re out on the water. You’ll be glad you did when you’re reeling in fish instead of dealing with line problems!
Before you hit the water, it’s crucial to test your fishing rod setup. A quick check can save you from frustration when you finally get a bite.
Testing Your Setup
Testing your fishing rod is all about making sure everything works smoothly. You want to ensure your casting ability is top-notch, the line is free of twists, and reeling feels effortless.
First up, check your casting ability. Grab a few practice casts in your backyard or nearby park. Pay attention to how the line flows off the reel and whether it lands where you want it. If the line doesn’t leave the rod smoothly, it could signal a problem.
Next, inspect the line for twists. Twisted lines can lead to tangles, which you’ll want to avoid at all costs. Hold the line up and let it hang. If you see any twists or kinks, take a moment to untangle them. A straight line means you’ll have a better experience on the water.
Lastly, ensure smooth reeling. Give your reel a few turns and listen for any strange noises. It should feel fluid and effortless. If you notice any grinding or resistance, it might be time to lubricate your reel or adjust the drag. A well-functioning reel is key to successfully landing a fish.
Imagine you’re out fishing, and suddenly a big one bites. You want to be confident that your setup is ready to handle the fight. So, take the time to test everything before you go. You’ll be glad you did!