

How To Set Up Your Fishing Rod involves assembling the rod, attaching the reel, and threading the line correctly. This process is crucial for ensuring optimal performance while fishing.
Setting up your fishing rod properly can make a significant difference in your catch rate. Whether you’re a beginner or an experienced angler, knowing the right steps can help you enjoy a more successful fishing experience.
Choosing the right fishing rod can make or break your fishing experience. With so many options available, it’s crucial to understand how to pick the one that fits your style and environment.

Choosing the Right Fishing Rod
Different fishing styles and environments require different types of rods. By knowing what to look for, you’ll be better equipped to catch that big one.
First, let’s break down the types of fishing rods. Spinning rods are great for beginners and versatile enough for various situations. They work well with lighter lures and lines. On the other hand, baitcasting rods offer more control and precision, making them ideal for experienced anglers aiming for larger fish. Think about your skill level and what you’ll be fishing for to make the right choice.
Next, consider the length and power of the rod. Generally, shorter rods give you better accuracy, while longer rods can cast farther. Power refers to the rod’s strength; light rods are great for small fish, while heavy rods are suited for larger species. For example, if you’re fishing in tight spaces like a riverbank, a shorter, lighter rod might be your best bet.
Another key aspect is rod action, which describes how much the rod bends when pressure is applied. Fast action rods bend near the tip and provide quick hook sets, making them perfect for quick strikes. Slow action rods bend more throughout, offering a gentler touch for lighter bites. Match your rod action with the bait you plan to use for optimal performance.
When trying to figure out which rod suits you, think about your fishing style and the environment. If you’re planning a weekend trip to a lake to catch bass, a medium power, spinning rod with a fast action can do wonders. But if you’re heading out for a deep-sea adventure, a heavy baitcasting rod might be the better choice.
Always remember to test the rod in-store if possible. Feel how it balances in your hand and how it responds to your movements. This way, you’ll know you’re making the right choice for how to set up your fishing rod.
Assembling your fishing rod is a straightforward task that sets the stage for a successful day on the water. With just a few simple steps, you can ensure your rod is ready to reel in that big catch.

Assembling Your Fishing Rod
Getting your fishing rod ready involves connecting its sections and securing the reel. Let’s walk through the easy steps to assemble your rod correctly, so you can focus on the fun of fishing.
First, start by connecting the rod sections securely. Lay out the pieces and align them properly. Push each section together with a firm grip, making sure they fit snugly. A loose connection can lead to issues later, particularly when you hook a fish. You don’t want to lose that trophy catch because of a simple mistake!
Next, check for the alignment of the guides. The guides are those little rings along the rod that help the line flow smoothly. Take a moment to ensure they’re all lined up. Misaligned guides can cause your line to tangle, which is the last thing you want while fishing. It’s a good practice to look down the rod from the tip to the reel to spot any misalignment.
Don’t forget to ensure the reel seat is tight. The reel seat holds your fishing reel in place, and if it’s loose, your reel might wobble or even fall off while casting. Give it a good twist to make sure it’s secure. A tight reel seat will give you the stability you need when you’re casting lines or battling fish.
As a practical tip, try assembling your fishing rod at home before heading out. This way, you can familiarize yourself with the components and troubleshoot any issues without the pressure of being on the water. Plus, it can save you time and frustration when you’re ready to fish!
Attaching the fishing reel to your rod is a crucial step in the setup process. A secure reel means smoother casting and reeling in your catch. Let’s go through how to do it right.
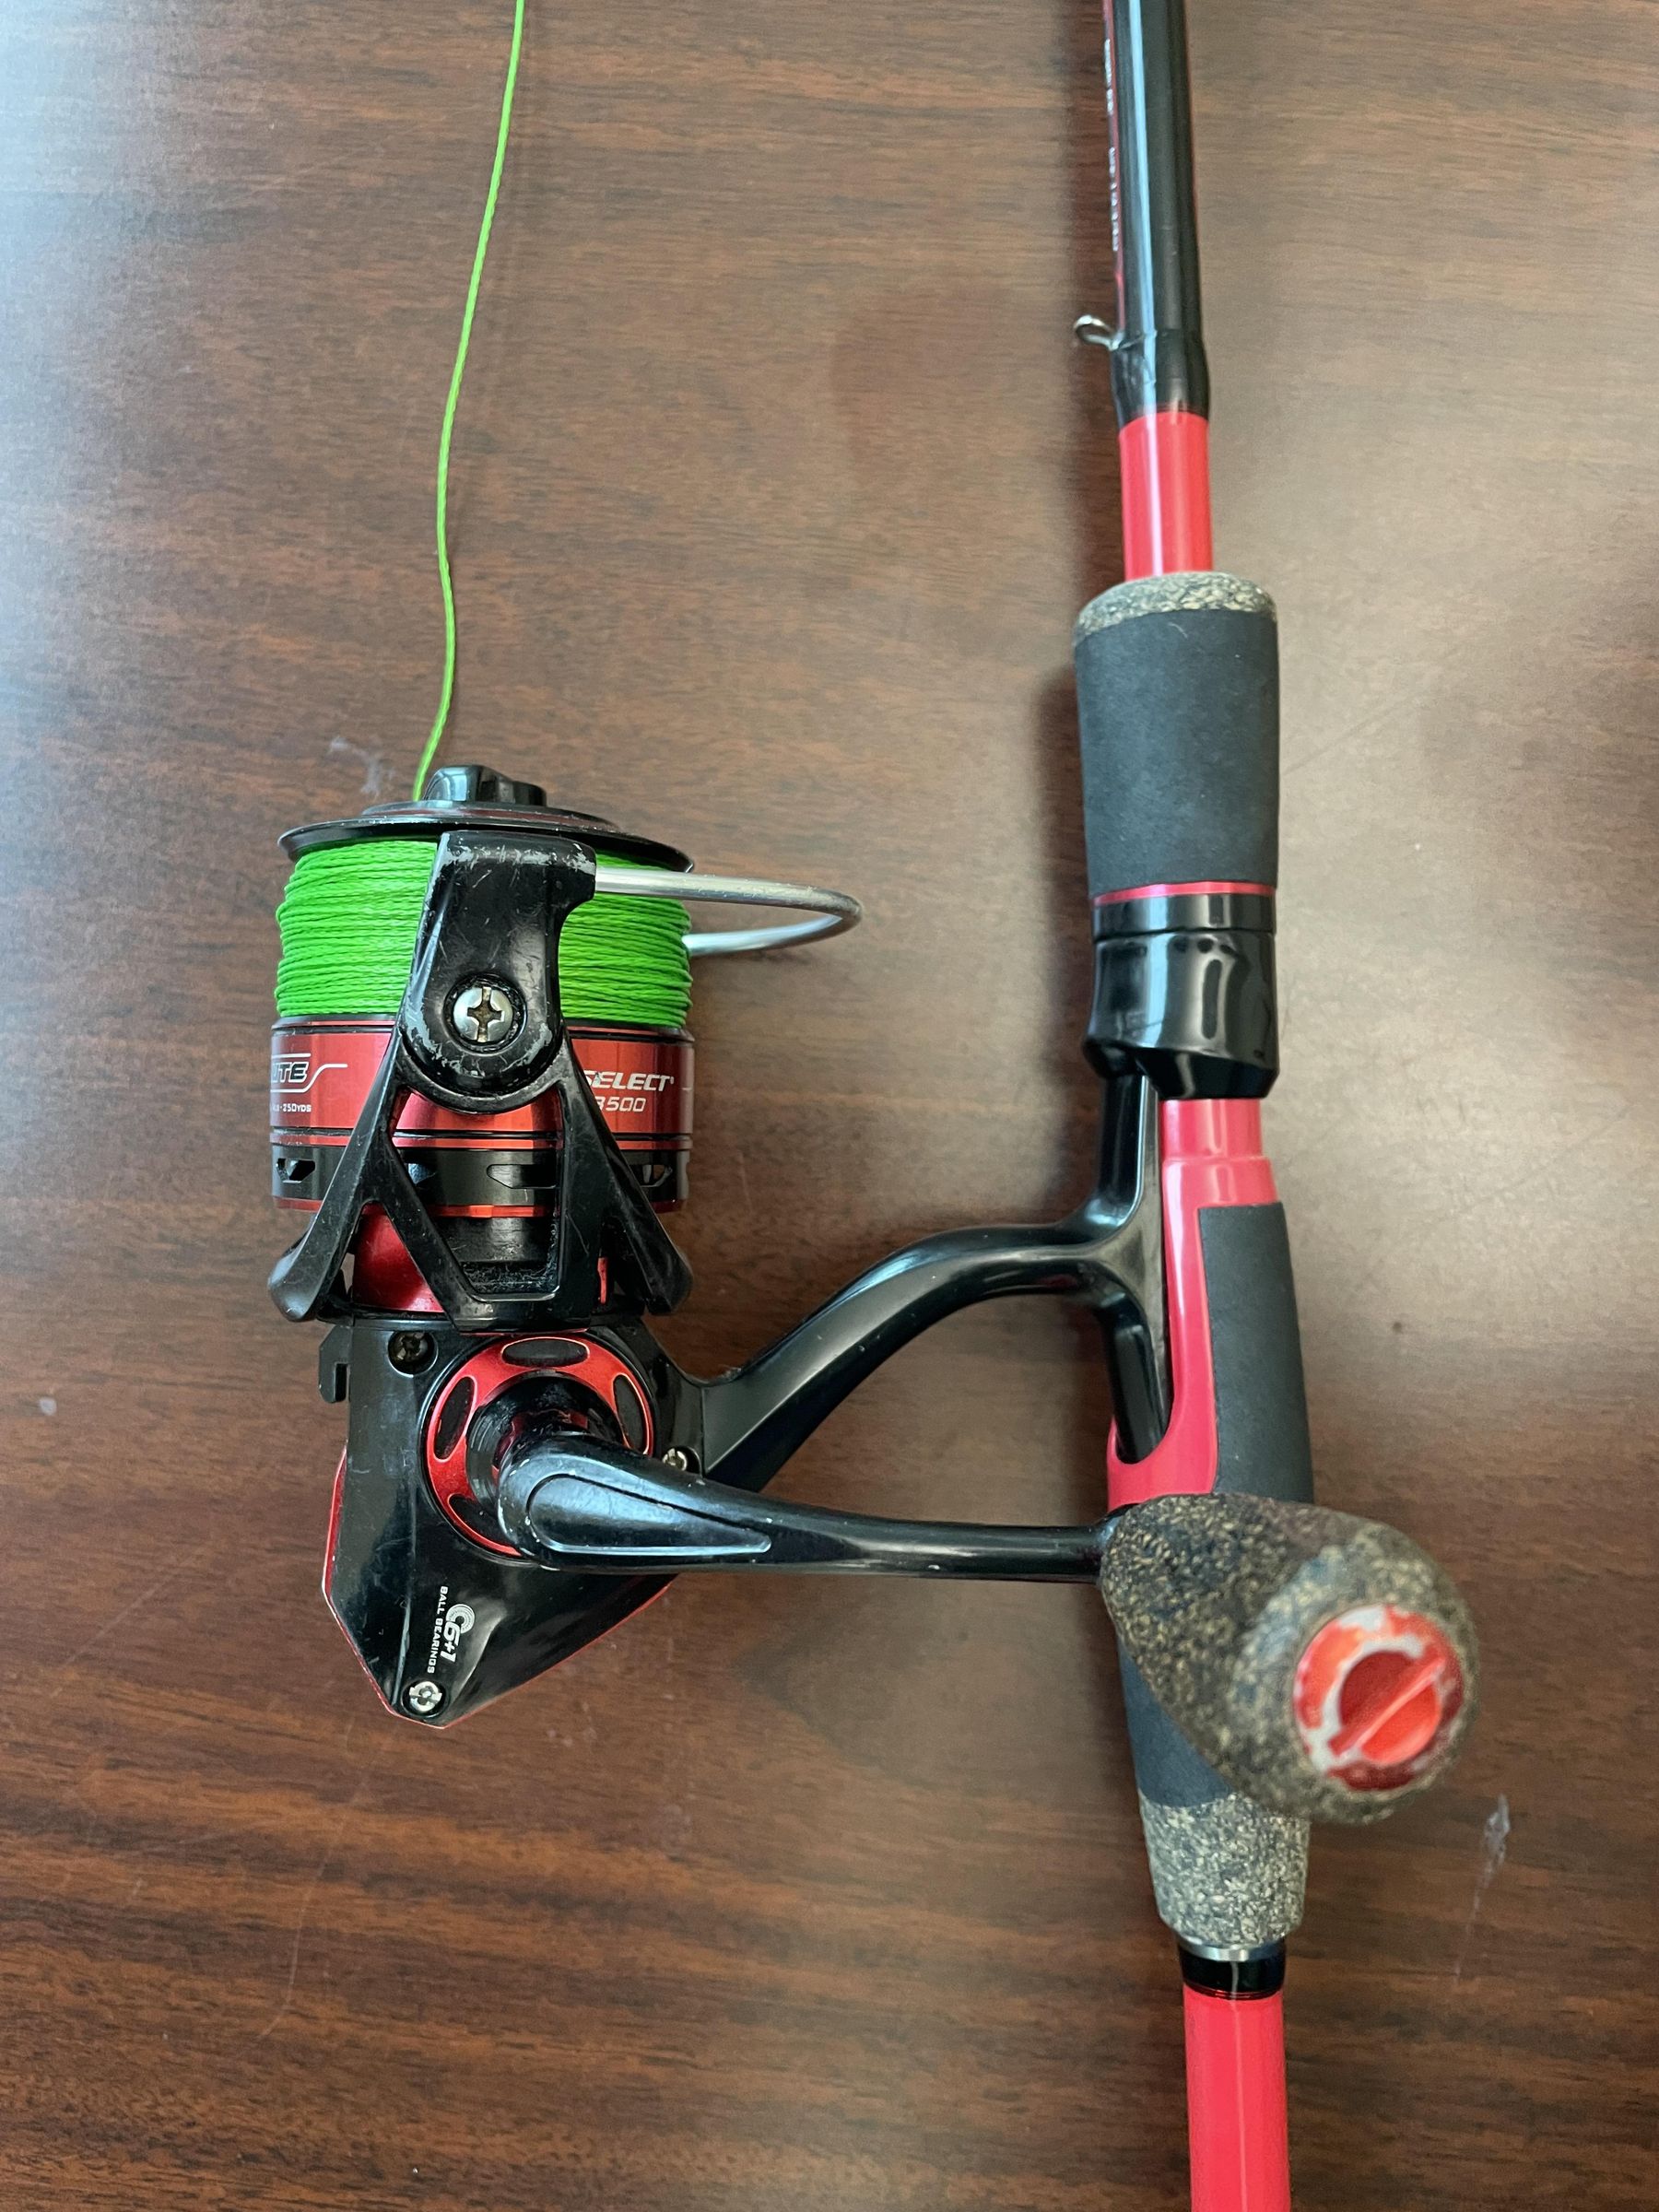
Attaching the Fishing Reel
Getting your reel attached properly ensures you’re ready for a successful fishing trip. This process involves finding the right spot on your rod, securing the reel, and making sure the drag system is adjusted to your needs.
First, you need to identify the reel seat location. Usually, this is a small, open section on the rod where the reel will fit snugly. Slide the reel into the seat so that the handle is positioned comfortably for you.
Next, secure the reel in place. Most reels have a locking mechanism that you can tighten to hold the reel firmly. Make sure it’s snug but not overly tight; you want to avoid damaging the rod or reel.
Now, let’s talk about adjusting the drag system. This is a vital aspect of your reel that controls how much resistance a fish feels when it pulls on the line. To adjust it, simply turn the drag knob located at the top of the reel. Test it by pulling on the line; you want it to give a little without being too loose. If you’re targeting larger fish, you’ll want a tighter drag, but if you’re after smaller ones, a looser drag can help prevent breaking the line.
For example, if you’re gearing up for bass fishing, you might want a medium drag setting. This allows for enough tension to reel them in without losing them if they make a quick dash. Just remember, every fishing scenario can call for a different drag setting.
After everything’s secure and adjusted, give your reel a little spin. This will help you feel if everything’s working smoothly. If it feels right, you’re all set! Enjoy your time on the water as you’ve now learned how to set up your fishing rod properly.
Threading your fishing line correctly is crucial for a successful fishing trip. If you get this part wrong, you could miss out on the big catch. Let’s walk through the steps to get your line ready.

Threading the Fishing Line
Threading your fishing line through the rod guides might seem tricky at first, but it’s pretty straightforward once you get the hang of it. You’ll want to make sure you choose the right type of line for your rod and reel. This will make the whole process smoother and improve your chances of landing a fish.
First, select the right fishing line type for your setup. Monofilament, fluorocarbon, and braided lines each have their own unique benefits. For instance, if you’re fishing in clear water, fluorocarbon might be the way to go since it’s less visible to fish.
Next, it’s time to thread the line through the guides. Start at the bottom of the rod and feed the line through each guide, working your way to the top. This method helps ensure that the line will flow freely when you cast. If you accidentally thread from the top down, you might end up with tangles or snags. Just like when you’re threading a needle, going from bottom to top keeps everything neat.
Once you’ve threaded the line through all the guides, it’s time to tie a secure knot at the end. A reliable knot, like the improved clinch knot, will keep your lure or hook firmly attached. Make sure to wet the knot before tightening it, as this helps prevent the line from fraying.
For example, if you’re gearing up for a day of bass fishing, make sure your line is tight and your knot is secure. Nothing’s more frustrating than losing a big one because of a faulty setup!
Always double-check that your line is threaded correctly and that your knot holds strong. This little precaution can save you time and help you enjoy your fishing trip more. Happy fishing!
Rigging your bait or lure is a crucial step in the fishing process. The right setup can mean the difference between a day of casting and reeling or coming home empty-handed.

Rigging Your Bait or Lure
Understanding how to properly rig your bait or lures will enhance your fishing experience significantly. By choosing the right hooks and mastering rigging techniques, you can maximize your chances of landing that big catch.
First, selecting the appropriate hooks for your bait is essential. Different species of fish respond better to specific hook types and sizes. For instance, if you’re fishing for bass, a wide-gap hook can help you secure larger baits, while smaller hooks work best for panfish.
Next, familiarize yourself with common rigging techniques. The Texas rig is a popular choice for plastic baits, allowing them to glide through weeds and brush without snagging. On the other hand, the Carolina rig is perfect for deeper waters, offering better weight distribution and a smooth presentation of your bait.
Weight Distribution
Proper weight distribution is key when you’re rigging. If your bait is too heavy, it might sink too quickly and scare off fish. Conversely, if it’s too light, it won’t reach the desired depth. Experimenting with different weights will help you find the sweet spot for the specific conditions you’re fishing in.
Imagine you’re out on the lake, and you notice fish jumping near the surface. You can quickly switch to a lighter weight and a top-water lure to entice them. This adaptability can make all the difference in your success.
As you gain experience, you’ll develop a feel for what combinations work best in various situations. Don’t hesitate to try new rigs and experiment with different baits. Each outing is a chance to learn and improve your skills.
Before you hit the water, make sure your fishing rod is in top shape. A few quick checks can save you from frustration later on. Let’s dive into those final steps.
Final Checks Before Fishing
Taking a moment for final inspections can make all the difference in your fishing experience. You want to ensure everything is functioning smoothly so you can focus on catching fish instead of dealing with equipment issues.
Start by inspecting your fishing line. Make sure there are no tangles or visible signs of damage. A frayed line can snap at the worst moment, leaving you without a catch and possibly losing your tackle. If you spot any issues, it’s best to replace the line before you head out.
Next, test your reel functionality. Give it a few spins and listen for any unusual sounds. A smooth operation indicates that your reel is ready. If it feels sticky or makes grinding noises, you might need to clean or lubricate it. Picture this: you’re casting your line, and your reel suddenly jams. Not a fun situation!
Lastly, verify your drag settings. Adjust them according to the type of fish you’re targeting. A lighter drag is great for smaller fish, while a tighter drag is essential for bigger catches. Make sure you can easily adjust it while fishing; it could mean the difference between landing a trophy fish or losing it at the last second.
Before you head out, remember to check the weather and water conditions too. Knowing what to expect can help you adapt your strategy on the fly. A little prep goes a long way in ensuring your fishing trip is a success!